How to Fix Leaking Shower Head: Easy DIY Solutions
A dripping shower head can be surprisingly stressful. At first, you might think, “It’s only a few drops, I’ll fix it later.” But then you hear that constant drip… drip… drip every time you walk past the bathroom.
And if the shower head keeps leaking after you’ve turned the water off, you may start wondering whether something is seriously wrong.
The good news is that a leaking shower head is often caused by something simple, such as a loose connection, worn washer, damaged O-ring, mineral buildup, or a problem with the shower valve. In many cases, you can fix it yourself with a few basic tools without calling a plumber immediately.
In this guide, we’ll show you how to fix a leaking shower head step by step, explain the most common causes, and help you understand when the problem is bigger than the shower head itself.
Let’s get that annoying drip under control.
Safety Note: Be Careful With Hot Water and Plumbing Connections
Safety Note: Be Careful With Hot Water and Plumbing Connections
Before working on your shower, turn the water off and allow hot water to cool down. Avoid forcing tightly stuck plumbing connections, as this can damage the shower arm, pipe threads, or fittings inside the wall.
The U.S. Environmental Protection Agency (EPA) WaterSense recommends checking shower fixtures for leaks and maintaining them properly. For official guidance on preventing and fixing household water leaks, see the EPA WaterSense Home Maintenance Guide.
If water is leaking from inside the wall, around the valve, or from a damaged pipe, don’t continue with a DIY repair. Contact a qualified plumber to avoid causing further damage.
For more practical home and technology solutions, visit UAEFIXES.COM.
Why Is My Shower Head Leaking?
Before grabbing a wrench, it helps to understand where the water is actually coming from.
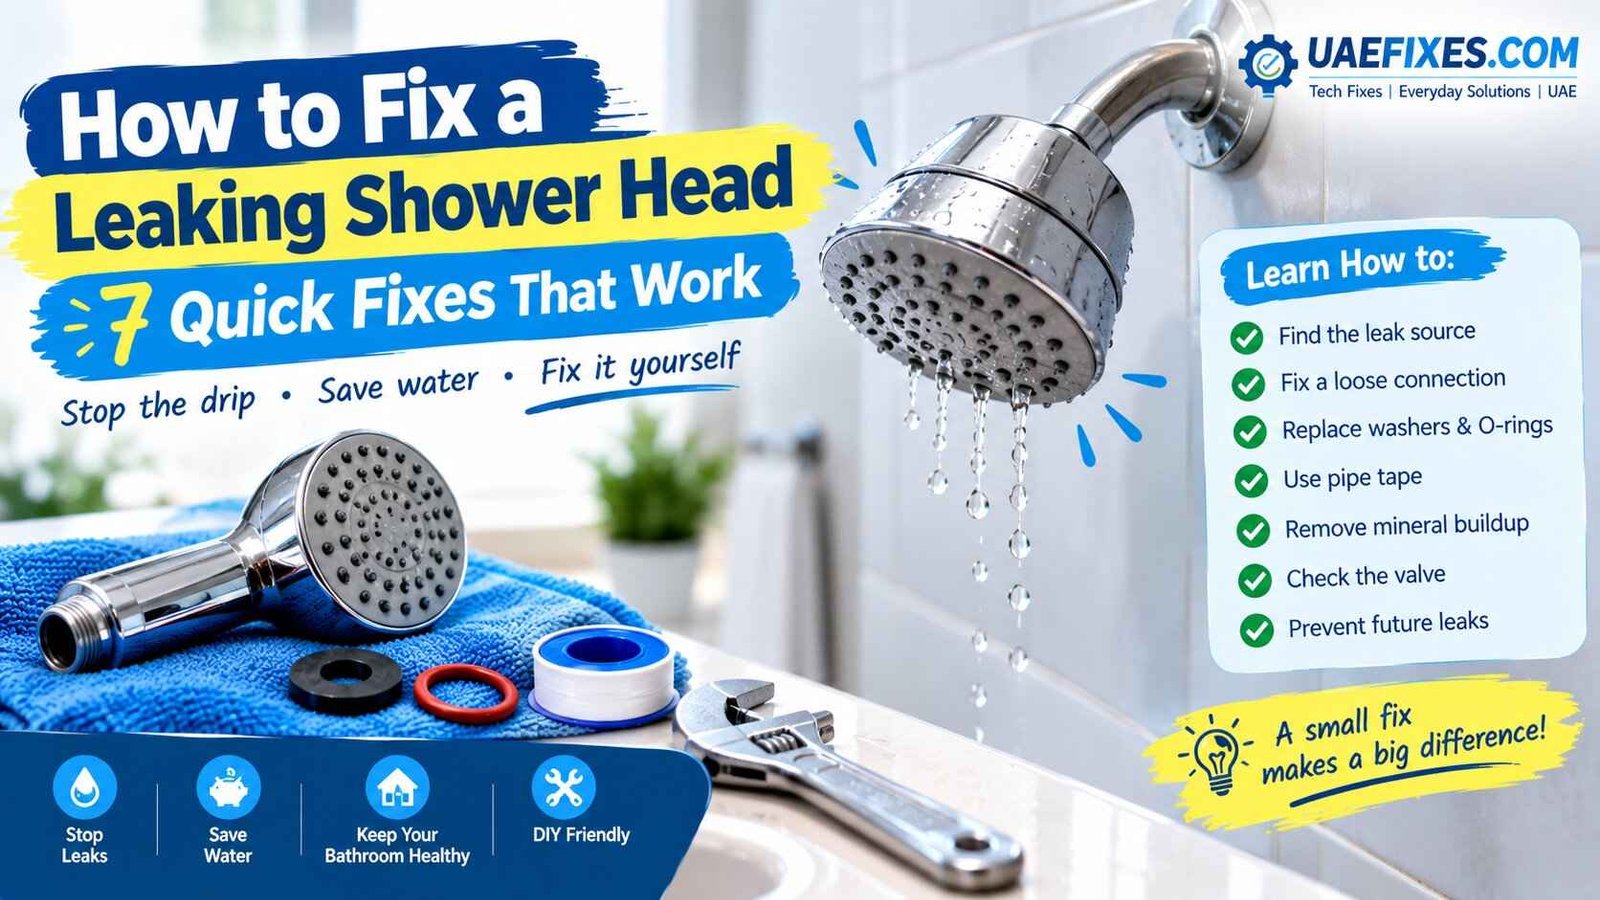
A leaking shower head can be caused by:
- A loose showerhead connection
- A worn rubber washer
- A damaged O-ring
- Old or incorrectly installed pipe tape
- Mineral or scale buildup
- A cracked showerhead
- A damaged shower arm
- A faulty shower valve
- High or irregular water pressure
- A leaking diverter in a bath-and-shower setup
The good news is that several of these problems are relatively easy to fix.
First: Find Exactly Where the Leak Is Coming From
This small step can save you a lot of frustration.
Turn the shower off and watch the area carefully.
Leak from the connection
If water is coming from where the showerhead screws onto the pipe, the connection may be loose or the seal may be worn.
Water dripping from the showerhead itself
If water continues dripping from the spray holes after the shower is turned off, the problem may not actually be the showerhead.
A faulty valve or cartridge can allow water to continue reaching the showerhead.
Water leaking from the wall
If water is coming from around the shower arm or from inside the wall, don’t keep tightening things blindly.
This can indicate a plumbing problem that needs professional attention.
How to Fix a Loose Shower Head
If the leak is coming from the connection between the showerhead and shower arm, start with the easiest solution.
Step 1: Turn off the water
Turn the shower controls completely off.
If you’re going to remove the showerhead, make sure water isn’t flowing through the fixture.
Step 2: Remove the showerhead
Try loosening it by hand first.
If it is too tight, use an adjustable wrench carefully.
Wrap a cloth around the fitting before using the wrench to help protect the finish.
Step 3: Inspect the threads
Look at the threaded connection.
Check for:
- Old tape
- Dirt
- Mineral buildup
- Damaged threads
- Cracks
Clean the connection if necessary.
Step 4: Check the washer
Look inside the showerhead.
Many showerheads have a small rubber washer or seal inside the connection.
If it looks flattened, cracked, brittle or damaged, replace it.
Step 5: Reconnect the showerhead
Thread the showerhead back onto the shower arm.
Tighten it firmly by hand first.
If necessary, use a wrench for a small additional adjustment.
Don’t overtighten it.
Step 6: Test the shower
Turn the water on and watch the connection.
If the dripping has stopped, you’ve probably solved the problem.
How to Fix a Leaking Shower Head With Pipe Tape
Sometimes the threaded connection doesn’t seal properly.
This is where plumbing thread-sealing tape, commonly called PTFE tape or plumber’s tape, can help.
The EPA’s WaterSense guidance specifically recommends checking the connection and using pipe tape when necessary for showerhead leaks.
How to apply pipe tape
- Remove the showerhead.
- Clean the male threads on the shower arm.
- Dry the threads.
- Wrap the tape around the threads in the direction the showerhead will tighten.
- Keep the tape on the threads rather than covering the end of the pipe.
- Reinstall the showerhead.
- Tighten gently.
- Turn on the water and check for leaks.
Don’t cover the opening of the pipe with tape.
The tape is there to help seal the threaded connection, not block the water passage.
How to Replace a Shower Head Washer
A worn washer is one of the simplest things to fix.
Remove the showerhead and look inside the threaded connection.
You should find a small rubber washer in many designs.
If it is:
- Cracked
- Flattened
- Hard
- Brittle
- Missing
replace it with a suitable replacement.
Take the old washer with you when buying a replacement if possible. Matching the size and type makes the repair much easier.
The EPA also recommends checking and replacing the washer or O-ring when working on a leaking showerhead.
How to Fix a Shower Head With Mineral Buildup
If your showerhead has white, chalky deposits around the spray holes or connection, mineral buildup may be affecting its performance.
This can happen over time, particularly in areas with harder water.
Try cleaning the showerhead
Remove the showerhead if possible.
Then:
- Place it in a container.
- Add white vinegar or a suitable cleaning solution.
- Allow the buildup to soften.
- Rinse the showerhead thoroughly.
- Clean the spray holes gently.
- Reinstall it.
- Check for leaks.
The EPA’s WaterSense guidance recommends periodically inspecting showerheads for scale buildup and using cleaning products or white vinegar when necessary.
Avoid drilling into the spray holes or aggressively scraping the fixture, as this can damage the showerhead.
What If the Shower Head Keeps Dripping After You Turn It Off?
This is an important distinction.
A few drops immediately after using the shower can simply be water remaining inside the showerhead.
But if the showerhead continues to drip for a long time, especially when water is not being used, there may be another problem.
The shower valve or cartridge could be allowing water through when it should be closed.
In that situation, replacing the showerhead may not solve the problem.
How to Tell If the Valve Is the Problem
Ask yourself:
Does the showerhead leak even when nobody has used the shower recently?
If yes, the valve or cartridge deserves attention.
This is different from a simple loose showerhead connection.
For more complicated valve leaks, the EPA recommends contacting an experienced handyperson or licensed plumber.
This is especially important if the valve is located behind the wall.
What If Water Is Leaking From the Shower Arm?
The shower arm is the pipe that comes out of the wall and connects to the showerhead.
If the leak appears around the shower arm connection, carefully inspect it.
You may need to remove the arm and reseal the threaded connection.
However, don’t force it aggressively.
The plumbing connection inside the wall can be damaged if excessive force is used.
If the arm moves excessively, appears damaged, or water is entering the wall, it’s safer to call a plumber.
How to Fix a Cracked Shower Head
Sometimes there simply isn’t a practical repair.
If the showerhead has:
- A visible crack
- Broken plastic
- Damaged threads
- A badly damaged connection
- Persistent leaking after replacing the washer
replacement may be the better option.
Showerheads are generally easier to replace than to repair when the actual body is damaged.
When buying a replacement, make sure the connection size is compatible with your existing shower arm.
Don’t Overtighten the Shower Head
This is a very common DIY mistake.
You notice a leak.
You grab a wrench.
You tighten it harder.
The leak continues.
So you tighten it even more.
This can damage the threads or the fitting.
A properly installed connection should seal without excessive force.
If a showerhead continues leaking after reasonable tightening and a new washer or appropriate pipe tape, investigate the actual cause rather than simply tightening it harder.
What If the Shower Head Leaks Only When the Shower Is Running?
If water sprays from the connection while the shower is operating, the most likely areas to check are:
- Showerhead connection
- Washer
- O-ring
- Thread seal
- Cracked fitting
- Shower arm threads
Start with the connection because it’s usually the easiest place to inspect.
Remove the showerhead, check the washer and threads, reseal if necessary, and test again.
What If the Shower Head Is Leaking From the Spray Holes?
If the shower is turned off and water continues coming through the spray holes, check whether the dripping eventually stops.
If it stops after a short period, it may simply be leftover water draining from the showerhead.
If it continues indefinitely, the shower valve or cartridge may be allowing water through.
In that case, the showerhead itself may not be the problem.
Quick Fix Checklist
Before calling a plumber, check these simple things:
- Turn the water off.
- Identify exactly where the leak is coming from.
- Check the showerhead connection.
- Inspect the rubber washer.
- Check the O-ring if your model uses one.
- Clean mineral buildup.
- Add appropriate pipe tape if needed.
- Reinstall the showerhead carefully.
- Avoid overtightening.
- Test the shower.
- Call a professional if the leak comes from the wall or valve.
When Should You Call a Plumber?
A leaking showerhead is often a simple DIY repair, but not every leak should be handled yourself.
Contact a qualified plumber if:
- Water is leaking from inside the wall.
- The shower valve is leaking.
- You suspect a broken pipe.
- The shower arm is damaged.
- The connection inside the wall moves.
- You cannot stop the leak after basic repairs.
- There is significant water damage.
- You are uncomfortable working with the plumbing.
A small visible drip is one thing.
Water disappearing behind a wall is a completely different problem.
How Much Water Can a Leaking Shower Head Waste?
That tiny drip may not look like much, but constant leakage adds up.
The EPA’s WaterSense programme estimates that a showerhead leaking at 10 drips per minute can waste more than 500 gallons of water per year.
That’s a good reason not to ignore the problem indefinitely.
Fixing a small leak can save water and prevent the annoyance of listening to that constant dripping.
How to Prevent a Shower Head From Leaking Again
Once you’ve fixed the problem, a little maintenance can help.
Clean it regularly
Mineral buildup can affect the showerhead over time.
Don’t overtighten connections
Tight and secure is enough.
Check the washer
If you notice another leak developing, inspect the washer before assuming the whole showerhead needs replacing.
Inspect the connection
A quick visual check can catch a small leak before it becomes a bigger one.
Replace damaged parts
Don’t keep trying to repair a cracked showerhead or badly damaged fitting.
Regular inspection and maintenance are also recommended by EPA WaterSense for showerheads and other water-using fixtures.
Frequently Asked Questions
Why is my shower head leaking?
Common causes include a loose connection, worn washer, damaged O-ring, mineral buildup, poor thread sealing, a cracked showerhead, or a faulty shower valve.
How do I stop a shower head from dripping?
First identify where the water is coming from. If the connection is leaking, check the washer, clean the threads and use suitable pipe tape if necessary. If water continues coming through the showerhead after the shower is off, the valve may be the problem.
Can I fix a leaking shower head myself?
Yes, many simple showerhead leaks can be repaired at home using a replacement washer, basic cleaning and appropriate pipe tape.
Should I use plumber’s tape on a shower head?
Pipe-sealing tape can help seal a threaded showerhead connection when needed. The EPA’s WaterSense guidance specifically recommends pipe tape as one option for controlling certain showerhead leaks.
Why does my shower head drip after I turn it off?
A few drops can simply be leftover water draining from the showerhead. If it continues dripping for a long time, the shower valve or cartridge may need inspection.
Why is my shower head leaking from the connection?
The connection may be loose, the washer may be worn, the threads may not be sealed properly, or there could be damage to the fitting.
Can mineral buildup cause a shower head to leak?
Mineral or scale buildup can restrict flow and affect showerhead performance. Cleaning the showerhead periodically can help.
When should I replace the showerhead?
If the showerhead is cracked, badly damaged, has damaged threads, or continues leaking after replacing the washer and properly sealing the connection, replacement may be easier than repair.
Final Thoughts
A leaking shower head can feel like one of those small household problems that keeps getting pushed to tomorrow.
But you don’t have to live with the drip… drip… drip.
Start with the simple things: check the connection, inspect the washer, clean away mineral buildup and use appropriate pipe tape if needed.
If the water is coming from the valve or inside the wall, that’s your sign to stop and get professional help.
And once you’ve fixed it, take a moment to appreciate the silence.
No more dripping.
No more wasted water.
Just a shower that works the way it should.